IntroductionYou've just purchased your first humidor, and naturally, you're eager to fill it with premium cigars. But wait—adding cigars immediately to a brand-new humidor is one of the most costly mistakes a cigar enthusiast can make. Within days, your precious cigars could be dried out and ruined, victims of unseasoned wood that literally sucked the moisture right out of them. Proper humidor seasoning is a non-negotiable step that prepares the Spanish cedar interior to maintain stable humidity. This process takes patience—typically 7 to 14 days—but it's the difference between a humidor that protects your investment and one that destroys it. This guide will walk you through everything you need to know about humidor seasoning: why it's essential, what materials you'll need, step-by-step instructions for two proven methods, common mistakes to avoid, and how to verify your humidor is ready for cigars. |
|
Why Seasoning Your Humidor is Absolutely CriticalUnderstanding the ProblemWhen humidors leave the factory, the Spanish cedar interior is bone dry. Wood is hygroscopic—it naturally absorbs and releases moisture from its environment. If you place humid cigars (typically stored at 65-70% relative humidity) into a dry wooden box, the wood will aggressively pull moisture from the only available source: your cigars. This moisture transfer happens rapidly. Within 24-48 hours, cigars in an unseasoned humidor can drop to dangerously low humidity levels. Within a week, they may be completely dried out, with wrapper leaves cracking, oils evaporating, and flavors permanently damaged. What Seasoning AccomplishesProper seasoning saturates the Spanish cedar with moisture, bringing it to equilibrium with your target humidity level (typically 65-72%). Once seasoned, the wood acts as a humidity buffer:
The Timeline RealitySeasoning cannot be rushed. The moisture must penetrate throughout the wood's cellular structure—not just the surface. Attempting to speed up this process with excessive water or heat will warp the wood, damage finishes, or promote mold growth. Accept that your new humidor needs 7-14 days of preparation. Your cigars can wait safely in their original packaging, in a sealed ziplock bag with a Boveda pack, or in a temporary tupperdor during this time. |
|
Essential ItemsDistilled Water: The only type of water you should ever use in your humidor. Tap water contains minerals (calcium, magnesium, chlorine) that will leave deposits, promote mold, and damage your humidor over time. Available at any grocery store for under $2 per gallon. Clean Sponge or Lint-Free Cloth: Must be completely new and never exposed to soap, chemicals, or detergents. Natural sea sponges work excellently. Microfiber cloths are ideal for lint-free application. Small Bowl or Shot Glass: For holding distilled water inside the humidor during seasoning. Hygrometer: Essential for monitoring humidity levels. Digital hygrometers are more accurate than analog and easier to read. Optional but RecommendedBoveda 84% RH Seasoning Packs: Specially formulated two-way humidity packs designed specifically for humidor seasoning. These eliminate guesswork and prevent over-humidification. Hygrometer Calibration Kit: Either a Boveda calibration kit or materials for the salt test (table salt, bottle cap, ziplock bag). Accurate humidity readings are crucial. Patience and Discipline: Not sold in stores, but absolutely essential. The temptation to rush this process is strong—resist it. |
|
Method 1: The Traditional Distilled Water Wipe MethodThis classic approach has been used successfully for decades. When done carefully, it's highly effective and requires no special products beyond distilled water. Step 1: Prepare Your WorkspaceFind a clean, room-temperature area where your humidor can sit undisturbed for 7-14 days. Avoid locations near:
Room temperature should ideally be 65-75°F with moderate ambient humidity. Step 2: Prepare Your MaterialsPour distilled water into a clean bowl. Take your new sponge (or lint-free cloth) and submerge it completely in the distilled water. Let it absorb thoroughly, then wring it out firmly. The sponge should be damp and moist but not dripping wet. If you can squeeze water drops from it, wring it out more. Critical: Test the dampness level by wiping your hand. Your skin should feel moist but not wet. There should be no visible water beads left behind. Step 3: Wipe Down the Interior CedarUsing smooth, even strokes, gently wipe down all Spanish cedar surfaces inside the humidor:
Apply light, consistent pressure. The wood should look visibly darker and moist, but there should never be puddles, pools, or drips of water. Think of it like moisturizing your skin—you want even, absorbed moisture, not excess liquid sitting on the surface. What NOT to do:
Step 4: Add Water VesselFill a small bowl or shot glass with distilled water. Place it inside the humidor, positioning it where it won't tip over. This provides continuous passive humidification during the seasoning process. For larger humidors (75+ cigar capacity), consider using two small vessels placed on opposite ends. Step 5: Close and Wait - First 24 HoursClose the humidor lid completely. Do not open it. Place it in your chosen location and leave it completely undisturbed for 24 hours. During this time, the cedar is absorbing moisture both from your wipe-down and from the water vessel's evaporation. The wood fibers are slowly expanding and saturating. Step 6: First Inspection and RepeatAfter 24 hours, open the humidor and examine the cedar carefully: What to look for:
If the wood looks dry or significantly lighter in color than yesterday, repeat the wipe-down process. Use the same technique: damp sponge, even application, no pooling water. Refill your water vessel to the original level. Close the humidor and wait another 24 hours. Step 7: Daily Monitoring (Days 2-4)Continue this process daily:
Most humidors will need 3-4 wipe-downs total over the first 4-5 days. You'll notice that the wood starts staying moist longer between treatments—this is good progress. Step 8: Add Hygrometer and Monitor (Days 5-7)After 4-5 days of the wipe-and-wait process, place your calibrated hygrometer inside the humidor. Continue keeping the water vessel inside. Close the humidor and begin monitoring the humidity readings. Check once or twice daily, but avoid opening excessively—every time you open the lid, you release humidity and extend the process. Target readings:
Step 9: Stabilization Period (Days 8-14)Once your humidity readings reach and maintain 65-72%, keep the humidor closed with the water vessel inside for an additional 3-5 days. This ensures the moisture has penetrated throughout the wood, not just the surface layers. The patience test: If you've reached 68% humidity on day 7, resist adding cigars. Wait until day 10-11 to ensure the reading remains stable. This extra time prevents disappointment later. Step 10: Final PreparationWhen humidity has remained stable in your target range for at least 3 consecutive days:
|
|
Method 2: The Boveda 84% RH Seasoning Pack MethodThis modern approach eliminates much of the guesswork and manual labor involved in traditional seasoning. Boveda 84% RH packs are specifically engineered for humidor seasoning (note: regular Boveda storage packs are 65%, 69%, or 72%—you need the 84% seasoning packs for this process). Why 84% RH?The higher humidity level ensures the wood reaches full saturation more quickly and thoroughly than traditional methods. Once seasoning is complete and you switch to standard 65-72% packs, the wood stabilizes at the lower level. Step 1: Calibrate Your HygrometerBefore beginning, ensure your hygrometer reads accurately. Use either:
Step 2: Prepare the HumidorRemove all plastic wrapping from your humidor's interior. Remove any pre-installed humidification devices (foam humidifiers, empty gel jars, etc.). Leave only the cedar interior. Do NOT wipe down the cedar. The Boveda packs will handle all moisture transfer. Step 3: Calculate Pack QuantityBoveda recommends one 84% RH seasoning pack per 25 cigars of humidor capacity:
Using more packs than recommended is fine and may speed the process slightly. Using fewer will extend the time required or result in incomplete seasoning. Step 4: Place Seasoning PacksUnwrap the Boveda 84% packs completely—remove all plastic wrapping so the packet's permeable membrane is fully exposed. Place the packs directly on the Spanish cedar surfaces throughout the humidor:
The packs should have direct contact with as much cedar as possible. Step 5: Close and DO NOT OPENThis is the critical difference from the water wipe method: Close your humidor and do not open it for 14 full days. Every time you open the lid, you:
Mark your calendar for exactly 14 days from now. Resist all temptation to "check progress." Trust the process. Step 6: The 14-Day WaitDuring these two weeks, the Boveda packs are:
The packs may feel softer and lighter as they release moisture—this is normal and expected. Place your humidor in a stable, room-temperature location away from direct sunlight, heating sources, and air conditioning vents. Step 7: Day 14 - Remove Seasoning PacksAfter exactly 14 days, open your humidor. Remove all 84% seasoning packs. They have completed their job and should not be reused. The Spanish cedar should look richer in color and feel slightly moist to the touch. The humidor may smell more strongly of cedar—this is excellent. Step 8: Install Regular HumidificationImmediately install your chosen humidification system for regular storage:
Place your calibrated hygrometer inside and close the humidor for 24 hours. Step 9: Verify and Add CigarsAfter 24 hours with your regular humidification installed, check your hygrometer. It should read at or near your target humidity level (whatever percentage your Boveda packs or humidifier is set to maintain). If readings are stable, your humidor is ready for cigars! Advantages of Boveda Method:
Disadvantages:
|
|
Calibrating Your Hygrometer: The Salt TestAccurate humidity readings are essential for proper humidor management. Most hygrometers—even expensive ones—require calibration. The Salt Test Method (75% Standard)Materials needed:
Instructions:
|
|
Boveda Calibration Kit MethodFor even easier calibration, Boveda makes single-use calibration kits:
This method is foolproof and eliminates mixing salt paste, but costs $5-10 per kit. |
|
Critical Seasoning Mistakes to AvoidMistake #1: Using Tap WaterThe Problem: Tap water contains minerals (calcium, magnesium), chlorine, fluoride, and other additives. These leave white crusty deposits, promote mold and bacteria growth, can cause unpleasant odors, and may permanently stain your Spanish cedar. The Solution: Only use distilled water. It costs less than $2 per gallon and will last for years of humidor maintenance. Mistake #2: Over-Saturating the WoodThe Problem: Applying too much water too quickly causes wood warping, damaged exterior finishes, mold and mildew growth, stuck lids or hinges, and can separate veneer from substrate wood. The Solution: Always wring out your sponge thoroughly. The wood should be moist, never wet. Never allow water to pool or puddle. If you see drips or drops, you've used too much water—wipe them up immediately with a dry cloth. Mistake #3: Rushing the ProcessThe Problem: "I'll just add my cigars now and the humidor will season itself" is a recipe for disaster. Your expensive cigars will dry out before the wood can absorb enough moisture to stabilize. The surface may seem humid while the interior wood stays dry, leading to unstable conditions. The Solution: Commit to the full timeline. Traditional method: minimum 7 days. Boveda method: exactly 14 days. Your cigars can wait safely elsewhere. Mistake #4: Opening Too Frequently During SeasoningThe Problem: Every time you open the humidor to "check progress," you release all the humid air that's been building up. Humidity has to start over. What could take 7 days can stretch to 20+ days if you check daily. The Solution: With the traditional method, limit inspections to once every 24 hours during the wipe-down phase, then once every 48 hours during monitoring. With Boveda method, do not open AT ALL for 14 days. Mistake #5: Applying Water to Exterior or HardwareThe Problem: Exterior finishes (lacquer, varnish, exotic woods) are not meant to get wet. Water damages finishes, causes clouding or spotting, rusts hinges and locks, and can seep under veneer causing lifting. The Solution: Only apply moisture to Spanish cedar interior surfaces. Immediately wipe up any drips or splashes on non-cedar surfaces. Mistake #6: Adding Cigars Too SoonThe Problem: "The humidity reached 68% so I added cigars after 3 days." The surface may be humid, but the interior wood is still dry. Within days, the wood draws moisture from your cigars and humidity plummets. Your cigars are damaged. The Solution: After humidity reaches your target range, wait an additional 3-5 days before adding cigars. Ensure readings remain stable—consistent measurements for multiple days prove thorough seasoning. Mistake #7: Using Propylene Glycol Solution for Initial SeasoningThe Problem: Propylene glycol (PG) solution is designed for maintenance humidification, not initial seasoning. It releases moisture too slowly for proper seasoning and can leave residue on unseasoned wood. The Solution: Season with distilled water only (traditional method) or Boveda 84% packs. After seasoning is complete, you can use PG solution in your regular humidification device if desired. |
|
Troubleshooting Common Seasoning ProblemsProblem: Humidity Won't Reach Target RangePossible Causes:
Solutions:
Problem: Humidity Too High (Above 75%)Possible Causes:
Solutions:
Problem: Wood Appears Warped or SwollenCause: Over-saturation with water—applied too much too quickly Solution: Open humidor and allow wood to dry partially for 24 hours. Resume seasoning with much less water, ensuring sponge is barely damp. If warping is severe, wood may need professional repair or humidor replacement. Problem: White Mold or Fuzz AppearsCauses:
Solutions:
Problem: Unpleasant Smell DevelopsCauses:
Solutions:
|
|
After Seasoning: First Cigar LoadingYour humidor is finally seasoned and ready! Here's how to add cigars properly: Start SlowlyDon't fill your humidor to capacity immediately. Add 50-75% of its capacity first, leaving room for air circulation and humidity distribution. Arrange Thoughtfully
Monitor Closely (First Two Weeks)Check humidity daily for the first week, then every 2-3 days for the second week. Humidity may fluctuate slightly as cigars adjust to the environment and release or absorb moisture. Expected behavior:
Adjust as NeededIf humidity drops below 62%, add another Boveda pack or refill humidification. If humidity rises above 74%, remove a Boveda pack or reduce humidifier output. |
|
Long-Term MaintenanceWhen to Re-SeasonEven properly maintained humidors occasionally need re-seasoning:
Ongoing Care
|
|
Seasoning Large Cabinet HumidorsCabinet humidors require more time and resources:
Seasoning Travel HumidorsMost travel humidors have minimal Spanish cedar and don't require traditional seasoning:
Seasoning Acrylic or Plastic HumidorsTupperdors and acrylic humidors don't require seasoning:
|
|
ConclusionProperly seasoning your humidor is an investment in patience that pays dividends for years. Those 7-14 days of careful preparation create the stable environment that protects hundreds or thousands of dollars in cigars throughout their lifetime in your collection. Whether you choose the traditional distilled water method or the foolproof Boveda approach, commit to the full process without shortcuts. The difference between a properly seasoned and improperly seasoned humidor is the difference between cigars that age gracefully and cigars that dry out prematurely. Remember: Your cigars took months or years to create—from seed to soil, to harvest, fermentation, rolling, and aging. They've traveled thousands of miles to reach you. They can certainly wait two weeks while you prepare their new home properly. Season right, and your humidor will be a faithful guardian of your collection for decades to come. Proper humidor seasoning is essential for cigar preservation. Take your time and follow these instructions carefully for best results. This guide is intended for adults of legal smoking age. |
Beginner
Humidor Care
0 views
How to Properly Season Your Humidor Before First Use: The Complete Guide
Seasoning your humidor is the most critical step before storing cigars, yet it's often rushed or skipped entirely. This comprehensive guide provides detailed step-by-step instructions for properly preparing your new humidor, explaining why seasoning matters, common mistakes to avoid, and expert tips for achieving perfect results that will protect your cigar collection for years.
By exodus |
23 min read
October 4, 2025
(Updated: Oct 4, 2025)
(Updated: Oct 4, 2025)
Related Articles
Best Budget Humidors Under $100: Quality Storage …
Oct 04, 2025 • 20 min read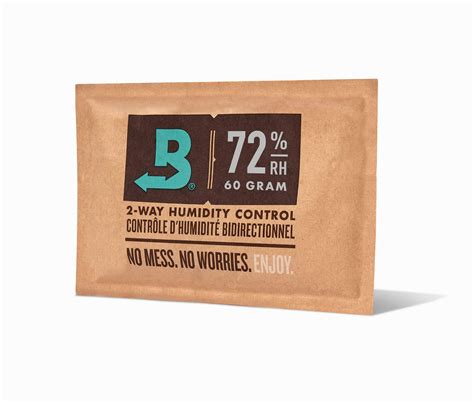
Boveda Packs vs Traditional Humidifiers: Which is…
Oct 04, 2025 • 15 min read
5 Common Humidor Mistakes Beginners Make (And How…
Oct 04, 2025 • 16 min readShare Article
Recent Articles
The Complete History of Cigars: From An…
Oct 04 • 26 min
How to Cut a Cigar: Complete Guide to C…
Oct 04 • 21 min
Best Budget Humidors Under $100: Qualit…
Oct 04 • 20 min
How to Fix an Over-Humidified Cigar: Re…
Oct 04 • 14 min